Step 1: Log in to your WordPress Account
To start adding a blog post to your WordPress website, navigate to the admin login page, which is typically located at www.yourdomain.com/wp-admin. Enter your username and password to access the WordPress dashboard.
Step 2: Access the Posts Section
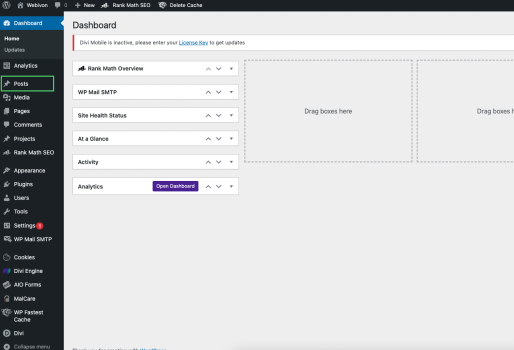
Once you are logged in, you will be directed to the WordPress dashboard. On the left-hand side, you will see a menu. Click on “Posts” to access the blog posts section.

Step 3: Click on “Add New”
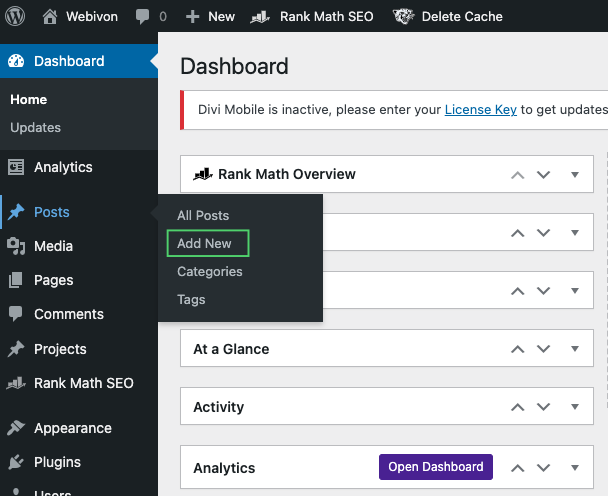
In the blog posts section, you’ll find a button labeled “Add New.” Click on this button to begin creating a new blog post.

Step 4: Enter the Blog Post Title
In the editor area, you’ll see a text box at the top. Enter the title of your blog post here. Make sure it is clear, concise, and captures the essence of your content.

Step 5: Compose Your Blog Post Content
Now it’s time to write your blog post! Utilize the editor tools to format your content. Add headings, paragraphs, lists, and other elements to make your post visually appealing and easy to read. You can also insert images, videos, and other media to enhance your post’s content.
Step 6: Format Your Blog Post
Use the formatting options provided in the editor to style your text. You can make text bold, italic, underline, and align it according to your preferences. Pay attention to spacing, grammar, and overall readability.
Step 7: Add Categories and Tags
On the right-hand side of the editor, you’ll find the “Categories” and “Tags” sections. Choose relevant categories that best fit your blog post content. Additionally, add relevant tags to help users find your post through specific keywords.
Step 8: Set a Featured Image
Scroll down to the “Featured Image” section below the editor. Click on the “Set featured image” link to upload and select an image that represents your blog post. This image will often be displayed on the homepage or in social media previews.
Step 9: Preview Your Blog Post
Before hitting the “Publish” button, you can click the “Preview” button to see how your blog post will appear on your website. This allows you to make any final adjustments before making your post public.
Step 10: Save Your Blog Post as a Draft
If you’re not ready to publish the post immediately, you can save it as a draft. This allows you to come back later and continue editing.
Step 11: Publish Your Blog Post
When you’re satisfied with your blog post, click the “Publish” button located on the top right corner. Congratulations! Your blog post is now live on your WordPress website for your readers to enjoy.
Remember to share your newly published post with your audience through social media and newsletters to increase its reach and engagement. Happy blogging!!


